
How to Apply False Eyelashes Easily Without Feeling Overwhelmed
Learning how to apply false eyelashes easily starts with choosing a manageable lash style and following a clear sequence. You do not need professional makeup skills to achieve a neat result. A comfortable fit, a small amount of suitable adhesive, and careful placement usually matter more than expensive tools or dramatic lash designs.
The trickiest part is often positioning the lash strip before the glue sets. If the adhesive is too wet, the band may slide around instead of staying where you place it. Preparing your lashes first and following the glue’s waiting instructions gives you more control when you reach this stage of application.
Give yourself time to practice when you are not rushing to leave the house. Your first few attempts may involve lifting the strip, adjusting the corners, or trying a different fit. These small corrections help you learn the technique, and the process usually becomes more comfortable as you understand what works for your eyes.
Choose Lightweight Lashes for Easier Application
For your first attempt, choose strip lashes with a thin, flexible band and relatively lightweight fibers. A flexible band follows the curve of your eyelid more easily than a stiff one. Short or medium-length lashes also make it easier to see your lash line while positioning the strip in front of the mirror.
Wispy false eyelashes are a practical choice if you want definition without a very dense finish. Their spaced fibers allow your natural lashes to remain visible, which can make blending easier. Look at the actual lash shape rather than relying only on packaging descriptions such as natural, glamorous, or suitable for beginners.
Half lashes can be another manageable option because they cover only part of the upper lash line. They add emphasis toward the outer corner and involve a shorter band to position. However, their placement still needs care, so check the product instructions and make sure the outer edge does not extend beyond your eyelid.
Prepare Your Tools and Set Up Your Mirror
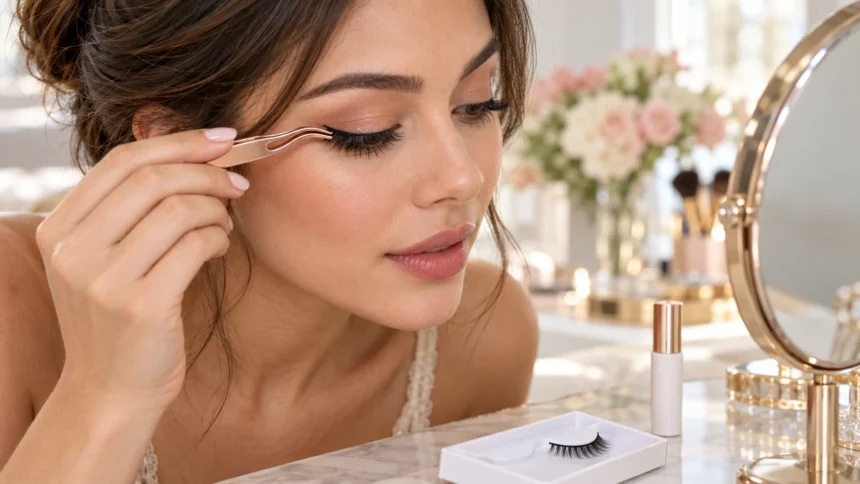
Gather your false lashes, lash adhesive, small clean scissors, and a mirror before beginning. A lash applicator can help you hold the strip steadily, although clean fingertips are also an option. If you use tweezers, keep the tips away from the eye and choose a grip that lets you control the band comfortably.
Use only adhesive intended for the type of false eyelashes you are applying. Strip-lash glue and adhesives designed for other lash systems are not interchangeable unless the manufacturer specifically says so. Read the directions before opening the product, paying attention to application, waiting time, removal, and any ingredient sensitivities you already know about.
Place your mirror slightly below eye level so you can look downward without closing your eyes completely. This angle often makes the upper lash line easier to see. Work in even lighting, rest your elbows on a stable surface if helpful, and keep everything within reach so you can concentrate on placement.
Clean and Prepare Your Natural Lash Line
Wash your hands before handling your lashes or touching the area around your eyes. Your upper lash line should be clean and free from oily residue that could interfere with adhesion. If you have used skincare products, make sure they have not left a slippery layer where the lash band will sit.
Complete your eyeshadow before attaching the lashes so you can blend the makeup without working around the fibers. A thin line of eyeliner is optional, but it can provide a visual guide and help disguise the band. Avoid building a thick or uneven layer directly along the area where the adhesive needs to attach.
If you normally curl your natural lashes, do so gently before applying the false pair. You can also add a light coat of mascara to your natural lashes and let it dry fully. Keep the lashes separated rather than heavily coated, since clumps can make it harder to position and blend the strip neatly.
Measure the Lash Strip Before Adding Glue
Lift the lash strip carefully from its tray, following the packaging instructions to avoid stretching the band. Hold it near your upper lash line without adhesive to check the width. This dry fitting helps you see whether the strip is too long before you begin working with glue or trying to secure the corners.
The band should follow your lash line without crowding the inner corner or extending past the outer edge. Leave a comfortable gap from the sensitive inner corner rather than trying to cover every millimeter. Blink gently during the fitting check and notice whether either end feels likely to poke or rub against your skin.
Check each eye separately because a comfortable fit on one side does not guarantee the same fit on the other. Small differences in eye shape and lash placement are normal. Taking a moment to measure both strips can prevent repeated lifting, uneven positioning, and the temptation to fix an oversized band with extra adhesive.
Trim and Shape the Band for a Comfortable Fit
If the lash strip is too wide, remove it from your face and trim a small amount from the outer end. Keep the scissors away from your eyes while cutting. Cut through the band rather than across the lash tips, preserving the graduated lengths that give the style its intended appearance.
Trim gradually and repeat the fitting check after each small adjustment. Removing too much at once can leave the strip shorter than you wanted or change its overall balance. Some lash designs have specific trimming guidance, so follow the manufacturer’s instructions if the fibers or band are arranged differently from a standard strip.
Gently flex the band into a curve if the product allows it, avoiding sharp folds or forceful bending. A curved band can sit more naturally along the eyelid and require fewer adjustments. Keep the fibers in their original direction, and stop manipulating the strip if the band begins to twist or lose its shape.
Apply a Thin Layer of Lash Adhesive
Hold the lash strip securely and apply a thin, even line of adhesive along the attachment band. Follow the product’s directions for the amount and method of application. Keep the glue away from the decorative fibers where possible, since excess adhesive can make the lashes look messy and complicate cleaning later.
Pay attention to both ends of the band because the corners need enough adhesive to stay attached. However, adding thick blobs can cause spreading and make placement harder to control. The aim is an even coating that supports the full band without leaving so much product that it transfers onto surrounding makeup.
After applying the glue, wait for the texture or timing specified on the label before placing the strip. Many strip adhesives need to become tacky rather than remaining freshly wet. Do not assume every formula behaves the same way, and avoid blowing on the band or touching the adhesive to test it.
Position the Center of the Lash Strip First
Look downward into your mirror while keeping your eye gently open and your face relaxed. Hold the strip around its center so the ends remain visible and easy to adjust. Bring it toward the upper lash line slowly, keeping the applicator or tweezers directed away from the surface of your eye.
Place the band on the eyelid skin immediately above your natural upper lashes, following the lash product’s directions. It should sit close enough to blend with the lash line without attaching to the waterline. Avoid pushing the band underneath your natural lashes unless you are using a separate system specifically designed for that placement.
Set the center lightly before securing either corner so you can judge the overall position. This gives you a reference point and reduces the chance of pulling the strip too far inward or outward. If it lands noticeably too high, reposition it while the adhesive still permits adjustment rather than pressing it firmly in place.
Secure the Outer and Inner Corners Carefully
Once the middle is positioned, guide the outer end toward the natural curve of your upper lash line. Make sure it finishes within the eyelid’s edge rather than hanging beyond it. Use gentle pressure to secure the band, keeping your tool controlled and avoiding any pulling on your skin or natural lashes.
Next, place the inner end without moving it into the sensitive corner beside your nose. This section can be awkward because the fibers are shorter and the space is smaller. Adjust your grip or mirror angle if needed, and work slowly rather than trying to reach the area with a sharp tool.
Allow the adhesive to set according to its instructions, then blink normally to check the fit. The lashes should not poke, pull, obstruct your vision, or make you hold your eyelids differently. If something feels wrong, remove the strip carefully and correct the fit instead of expecting discomfort to disappear during wear.
Blend False Eyelashes With Your Natural Lashes
After the band is secure, look for any visible space between the strip and your natural lash line. A very small gap may be softened with a thin touch of eyeliner. A larger gap usually calls for repositioning, because adding more makeup cannot fully correct a strip that is sitting too high.
Check your lashes from a normal viewing distance as well as close to the mirror. Focus on whether both eyes have a similar overall shape and level of fullness. Perfect symmetry is not necessary, but one strip sitting significantly higher or farther outward may make the makeup look uneven and feel less comfortable.
Mascara on the false lashes is optional and depends on the product’s care instructions. If permitted, use it sparingly because heavy layers can change the fibers and make reusable lashes harder to clean. Avoid using an eyelash curler after attachment, as squeezing the applied strip can disturb the band or tug your natural lashes.
Fix Lifting Corners and Other Application Problems
If a corner lifts, first check whether the band is too long or whether the skin beneath it has oily residue. Incorrect adhesive timing can also affect attachment. Fixing the cause usually works better than repeatedly adding glue, especially when the strip already feels awkward or fails to follow your eyelid’s curve.
For a small lifted section, follow the adhesive instructions for touching up and securing it again. Keep any added glue on the band and away from your eye. If the lash has shifted substantially or the adhesive has become messy, remove the strip, clean up as directed, and start again with better positioning.
If the lashes keep sliding during application, review the glue’s waiting time and how much you used. If they feel unusually heavy, try a lighter style during your next practice session. Stop using lashes or adhesive that cause irritation, and avoid repeatedly applying products to an area that already feels sore or uncomfortable.
Remove Your Lashes Gently and Care for Reusable Pairs
Remove temporary strip lashes before bed, using the method recommended for the adhesive and lash product. If the band resists, use a compatible remover to loosen the bond before lifting it. Pulling harder can tug your natural lashes, so take your time and separate the strip only when it releases comfortably.
Clean reusable lashes according to their instructions, removing adhesive residue carefully without pulling at the fibers. Different materials may need different cleaning methods, so avoid assuming every pair can be soaked. Handle the band gently, and do not use a lash again if it remains dirty, damaged, twisted, or difficult to clean.
Store the lashes in a clean protective case once they are dry as directed. Clean your applicator too, and avoid sharing lashes or tools with other people. If you develop persistent pain, swelling, discharge, or vision changes after wearing lashes, stop using the products and seek medical attention rather than trying another application.
Conclusion
Applying false eyelashes easily comes down to preparation, fit, and controlled placement. Choose a lightweight strip, measure it against each eye, and trim the band before applying adhesive. Following the glue’s instructions and placing the center first gives you a clear sequence to follow while you learn to manage the corners.
A natural-looking finish does not require a thick band, heavy mascara, or perfectly dramatic lashes. Comfortable placement close to the upper lash line often creates a more polished result than extra volume alone. Once you feel confident with a simple pair, you can experiment with different lengths and shapes to suit your makeup.
Make careful removal and cleaning part of the same routine as application. Gentle handling protects your natural lashes and helps reusable pairs maintain their shape. Practice when you have enough time, adjust one problem at a time, and let comfort guide your choices as false lashes become a familiar part of your makeup routine.
FAQs
What Is the Easiest Way to Apply False Eyelashes?
Measure and trim a lightweight strip, apply suitable adhesive, and follow its waiting instructions. Place the center just above your natural upper lashes, then gently secure the outer and inner corners.
Do I Apply False Eyelashes Before or After Mascara?
If you use mascara, apply a light coat to your natural lashes first and let it dry. Mascara on the false pair is optional and should follow the lash manufacturer’s care instructions.
Can I Apply False Eyelashes With My Fingers?
Yes, clean fingertips can work if you can hold and position the band steadily. A lash applicator may offer better control, but choose whichever method lets you keep tools safely away from your eye.
Why Do My False Eyelashes Keep Coming Off?
Common reasons include oily residue, an oversized band, uneven adhesive, or incorrect waiting time. Check the fit and preparation, then follow the glue instructions instead of repeatedly adding thicker layers.
Can I Wear False Eyelashes Without Eyeliner?
Yes, eyeliner is optional. A thin or clear lash band placed close to your natural upper lash line can look neat without it, provided the strip fits comfortably and attaches evenly.