
False Lashes for Beginners: Understanding the Basics
False lashes are cosmetic lashes that sit close to your natural lash line to add length, fullness, or definition. They can make everyday makeup look more polished or give an evening look extra impact. For beginners, the goal is choosing a comfortable pair and learning a simple application method that feels manageable.
Unlike lash extensions, most traditional false eyelashes are designed for temporary wear and removal at home. Strip lashes attach along the upper lash line using a suitable lash adhesive. They come in different lengths, shapes, and densities, so you can choose a subtle finish without committing to a dramatic style.
Your first attempt may take longer than expected, especially when positioning the band or waiting for the glue. That is a normal part of learning the technique. Practicing when you have spare time helps you understand your eye shape, control your tools, and apply lashes with less pressure before an event.
Choose the Right Type of False Lashes
Strip lashes are usually the simplest starting point because each lash band holds a complete row of lashes. You apply one strip to each eye and adjust its position before the adhesive sets. Look for a flexible band and a lightweight design, since thick bands can be harder to shape comfortably.
Individual lashes and small clusters allow more control over where you add volume, but they require extra patience. You can place a few near the outer corners for a softer effect. Follow the product’s intended placement and wear instructions, because temporary clusters and longer-wear lash systems may use different adhesives and methods.
Magnetic lashes are another option, although their application depends on the particular system. Some attach to magnetic eyeliner, while others use paired lash pieces. They are not automatically easier for everyone, so compare the steps before buying. For a straightforward first attempt, lightweight strip lashes with ordinary lash adhesive are a practical choice.
Find a Lash Style That Suits Your Eyes
Start with lashes that resemble your natural lashes, only slightly longer or fuller. Shorter styles with spaced-out fibers are easier to blend into everyday makeup. Very dense lashes can overwhelm a beginner’s look and make placement more obvious, especially if the band sits too far above the natural lash line.
Consider the effect you want rather than treating eye-shape advice as a strict rule. Lashes with more length in the center can create a rounded appearance, while styles that become longer toward the outside create an elongated effect. A balanced, wispy pair is a useful starting point when you are unsure.
Comfort matters as much as appearance when choosing false lashes for beginners. Check whether the fibers touch your eyelid, brow area, or glasses when you blink. If the outer corners feel heavy or crowded, try a shorter style. The most flattering pair is often the one that fits well and feels comfortable.
Gather Your Tools Before You Start
Prepare your lashes, an adhesive labeled for false eyelashes, a mirror, and small clean scissors for trimming the band. A lash applicator or tweezers can help with placement, but clean fingertips also work. Keep every tool steady and away from the eye itself, particularly when working near the inner corner.
Choose an adhesive that matches your needs and read its label before application. Clear-drying glue can make small placement mistakes less noticeable, while dark glue blends more easily with dark eyeliner. Check the ingredients if you have known sensitivities, and follow any testing instructions supplied by the manufacturer before using it.
Set everything on a clean, well-lit surface so you do not need to search for tools midway through application. A tabletop mirror positioned slightly below your face can make the upper lash line easier to see. Allow yourself enough time to work slowly, especially while learning how much adhesive your lash band needs.
Prepare Your Eyes and Natural Lashes
Wash your hands and make sure your eyelids and natural lashes are clean before starting. Oils, makeup residue, and skincare products along the lash line can interfere with adhesion. If you have already applied moisturizer or eye cream, keep the immediate lash placement area free from slippery residue before attaching the strip.
You can complete most of your eye makeup before applying false lashes, including eyeshadow and a thin line of eyeliner. This makes blending the band easier afterward. If you use an eyelash curler, gently curl your natural lashes before application, following the tool’s instructions and avoiding any pulling on the eyelid.
A light coat of mascara on your natural lashes can help them blend with the false pair. Let it dry before attaching the strip, and avoid building heavy layers that create clumps. Some people prefer to skip mascara entirely, particularly when their natural lashes already match the false lashes reasonably well.
Measure and Trim the Lash Band
Before using glue, hold the lash strip above your upper lash line to check its length. Position it where it would naturally sit without pressing it against your eye. The band should fit comfortably across the lash line and leave enough room at the inner corner to avoid poking or rubbing.
If the strip extends beyond the outer edge of your lash line, remove it and trim a small section from the outer end. Cut the band carefully rather than cutting through the decorative lash tips. Trim gradually and check the fit again, because removing too much can change the shape or leave a gap.
Measure each eye separately instead of assuming both strips need the same adjustment. Small differences in fit are common, and the lash placement should feel comfortable on each side. If the product allows it, gently flex the band into a curve before application so it follows your eyelid more easily.
Apply Lash Glue and Wait for the Right Texture
Apply a thin, even layer of lash adhesive along the band, following the product instructions. Keep the adhesive off your natural lashes and away from your eye. Pay attention to the ends because these areas often lift first, but avoid adding large blobs that can become messy or uncomfortable.
Many strip-lash adhesives need a short waiting period before placement so they become tacky rather than wet. The exact timing varies by product, so use the label as your guide. Applying the strip while the glue is too wet can cause sliding, while waiting too long may reduce its ability to attach.
Hold the strip securely while the adhesive reaches the recommended texture. There is no need to blow on it or touch the glue with your fingers. Use this moment to check which lash belongs on which eye, particularly with styles that have shorter inner fibers and longer outer fibers.
Place the False Lashes Close to Your Lash Line
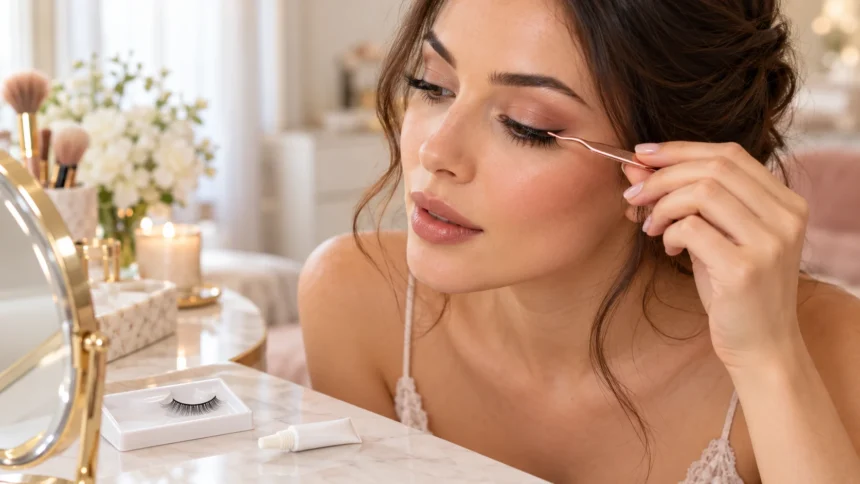
Look slightly downward into your mirror while keeping your eye gently open. Hold the strip near the middle with your applicator or fingertips and bring it toward the upper lash line. Place the band on the skin just above your natural lashes, following the product’s instructions and keeping it away from the waterline.
Set the center of the band first, then adjust the outer and inner ends while the adhesive still allows movement. Use small, controlled motions rather than pressing hard. The band should follow the curve of your eyelid without sitting on your natural lashes or extending into the sensitive inner corner.
Once the position looks right, gently secure the band and allow the adhesive to set as directed. Blink normally to check that nothing pokes, pulls, or interferes with your vision. If the placement feels uncomfortable, remove the lash carefully and try again instead of forcing it to stay in place.
Blend the Lash Band Into Your Makeup
After the adhesive has set, check the lash line for visible gaps between the strip and your natural lashes. A thin application of eyeliner can help disguise the band and create a continuous line. Keep the correction small so you do not accidentally turn a soft makeup look into something much heavier.
Look at both eyes from a normal viewing distance rather than inspecting only through a magnifying mirror. Slight differences often appear more noticeable up close than they do in everyday conversation. Focus on similar positioning and overall balance, while remembering that your natural eyes and lashes may not be perfectly symmetrical.
Avoid repeatedly squeezing the false lashes against your natural lashes or adding heavy mascara to the strip. These habits can distort the fibers and make removal or cleaning harder. If you want to apply mascara to the false lashes, first check whether the manufacturer recommends it for that particular material and design.
Fix Common False Lash Application Mistakes
If the inner or outer corner lifts, check whether the band is too long, poorly curved, or attached before the glue became tacky. Remove and refit the strip when needed rather than layering adhesive over a poor fit. For a small lifted area, follow the adhesive’s directions for careful reapplication.
A visible space above the natural lash line usually means the strip was positioned too high. Eyeliner may disguise a tiny gap, but a larger one is better corrected by repositioning the lash. Let the adhesive loosen using an appropriate remover if necessary, then clean the area before another attempt.
If your lashes feel heavy, poke your eyelid, or make blinking uncomfortable, reconsider the style and fit. More glue will not solve a band that is too stiff or too long. Remove lashes that cause irritation, and avoid applying another pair until the area feels normal and you understand the problem.
Remove, Clean, and Store Your False Lashes
Remove your lashes before sleeping, following the instructions for both the adhesive and the lash product. Use a compatible remover if needed to loosen the bond, rather than pulling against resistance. Once the adhesive releases, lift the strip gently without tugging your natural lashes or stretching the skin around your eyes.
If your lashes are reusable, clean them according to the manufacturer’s directions after each wear. Carefully remove adhesive residue from the band without pulling out the fibers. Avoid soaking or using oily products unless permitted, because different materials and lash constructions respond differently to moisture, cleansers, and makeup removers.
Allow reusable lashes to dry as instructed and return them to a clean case that protects their shape. Do not share lashes or applicators with other people, and replace pairs that become damaged or difficult to clean. Stop using the product if irritation develops; persistent pain, swelling, discharge, or vision changes require medical attention.
Conclusion
Learning to apply false lashes becomes easier when you break the process into clear steps. Choose a lightweight pair, measure the band carefully, and use an adhesive intended for the product. Giving the glue enough time to become tacky and placing the strip close to your natural lash line makes a noticeable difference.
You do not need the longest or fullest lashes to create an attractive result. A comfortable, well-fitted pair can add definition while still looking natural and feeling manageable throughout wear. Practice with a simple style first, then explore different lengths and shapes once you feel confident with placement and removal.
Good lash habits continue after your makeup is finished. Remove temporary lashes before bed, handle reusable pairs gently, and keep your tools and storage case clean. With patience and a consistent routine, false lashes can become an easy part of your makeup routine for everyday looks, celebrations, or special occasions.
FAQs
What Are the Best False Lashes for Beginners?
Lightweight strip lashes with a thin, flexible band are a practical starting point. Choose a short or medium-length wispy style that fits your lash line and feels comfortable when you blink.
How Long Should I Wait After Applying Lash Glue?
Follow the adhesive’s instructions, since waiting times vary. Many strip-lash glues need a short period to become tacky before placement; glue that is still too wet may let the lash slide.
Can I Wear False Lashes Without Mascara?
Yes, mascara is optional. False lashes can work well without it, especially when your natural lashes blend with the strip. A thin line of eyeliner may help conceal the band if needed.
How Many Times Can I Reuse False Lashes?
Reuse depends on the material, product instructions, and condition of the lashes. Replace them when the band loses its shape, fibers become damaged, or residue cannot be removed safely and thoroughly.
Why Do My False Lashes Keep Lifting at the Corners?
Common causes include an oversized band, oily skin, uneven adhesive, or incorrect glue timing. Measure the strip carefully, prepare the lash line, and follow the adhesive instructions before trying again.